When you start selling digital products, you need a storefront. At the moment there are two popular platforms, and that’s Stan Store and Beacons. Both offer unique features for creators, so let’s find out which one is right for you!
A shop online where people can buy your products. Do you
On social media, a link-in bio shop is your best option. It’s like a mini website where people don’t get lost in too much information: it’s clean and clear.
Setting up an online store to sell your digital products has never been more simple… thanks to Stan Store! Stan Store is your ONE-STOP-SHOP and it is going to be where your digital offers live (your freebie, digital products, emails). Your audience can simply click your Stan Store link in your bio, shop your digital products, and receive them straight to their inbox.
Therefore I wrote this blog on how I set up my Stan store, and how you can do it to – with screenshots and examples.
Disclosure: This post may contain affiliate links, meaning if you decide to make a purchase via my links, I may earn a commission at no additional cost to you. See my disclaimer for more info.
There are other options that you can choose from, however, Stan Store is hands down my absolute fav platform to sell my digital products. I run my entire digital product business here, and it’s SUPER beginner-friendly. There are also SO many other things you can do with Stan Store such as host affiliate links, create courses, email marketing, schedule Zoom calls + much more!
I’ll take you step by step through the process of how I set up my Stan Store, so you can use this blog as your guide when you want your own Stan store. A Stan store is super easy to use for beginners, and because of that you really don’t need any coding experience to get started. Even I can dot it!
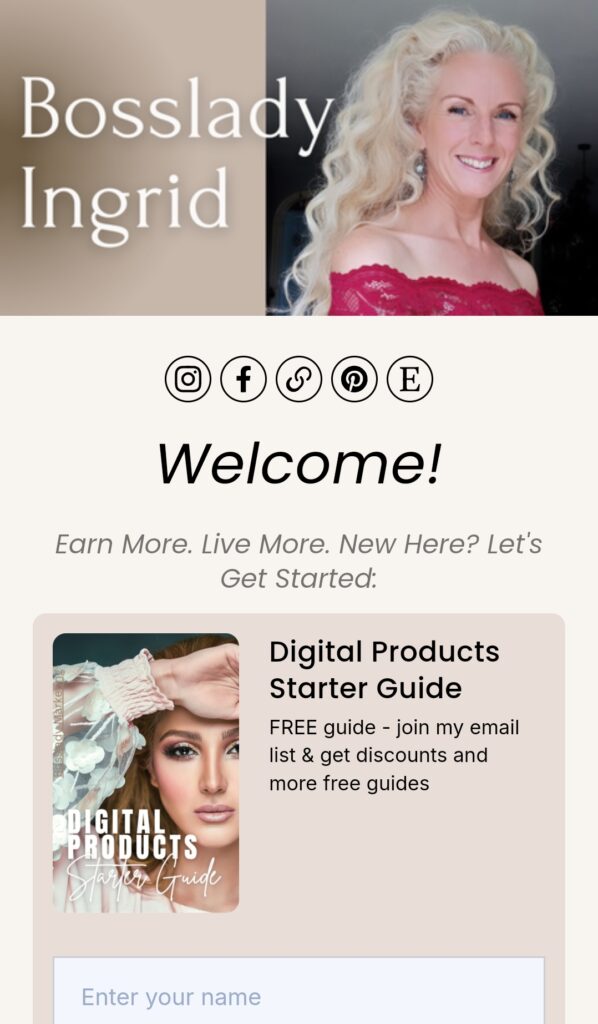
In this article I’ll show you what my Stan store looks like, I made screenshots to show you what you can see when you are logged in. The name of my business is Bosslady Marketing and I personalized it with my own name, Ingrid so my Stan store’s name is: “Bosslady Ingrid”
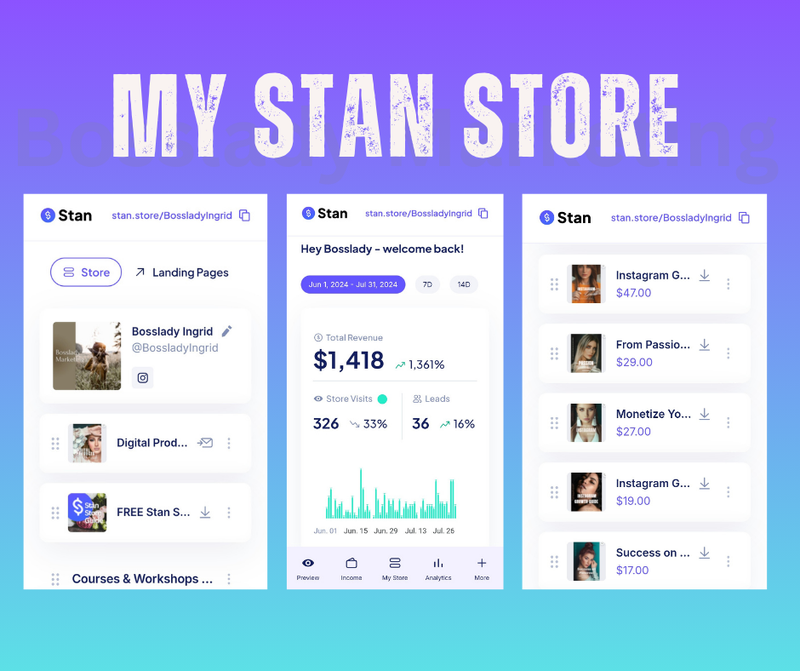
These are screenshorts from my own Stan Store, this is what it looks like when you are logged in.
What is Stan Store?
Firstly, Stan Store is a platform that content creators can use to sell digital products, courses, and book appointments and services. It’s very easy to setup, and only took me about 20 minutes to get started. Secondly, I love that you can customize your store to match your style with different designs and features. Thirdly, and most importantly, how awesome is it that you can set up an online store that quickly?! Like me, I am sure you have seen Stan Store links all over Instagram and TikTok. Follow me as I sign up for my free trial of Stan Store below.
Why YOU need a Stan Store
A Stan creator store is one of the fastest ways to get started selling a digital product online. If you can use Canva, you can use Stan Store. Above all, no special skills, are needed. They have so many templates, and you can change the colors, fonts, and add your logo to personalize your store.
Top Features:
- Easy setup process, perfect for beginners.
- Seamless integration for setting up a Link in Bio.
- One-click payment processing for smooth transactions.
- Customizable branding and design options.
- Analytics tools to track sales and customer engagement.
What is the difference between Stan Store and Linktree?
Stan Store vs. Linktree: Which Link-in-Bio Tool Is Better? One of the biggest differences between the two platforms is what they offer to creators in terms of monetization features. While Linktree is a super simple way to share links, it’s not much of an e-commerce tool, and Stan store is.
Stan is all about being a platform that helps you monetize your following. As a result, it’s absolutely the better choice if you want to sell your digital products!
Why I like Stan Store:
* Simple and User-Friendly: So easy to use! Even beginners can get started in no time. There are not a ton of features, so it doesn’t feel overwhelming, but just enough to keep it simple.
* 14-Day Free Trial: Not sure if Stan Store is right for you? No problem! Sign up for a free 14-day trial to test it out risk-free.
* Mobile and Desktop Friendly: While you can set up your store from your phone, I recommend using your laptop or PC for the best experience. It will show you a preview of what your store will look like on the phone, so don’t worry!
GET YOUR FREE 14 DAY TRIAL NOW (Sign up and come back to read the rest!)
How much is a Stan Store
How much does it cost to start a Stan store? Stan Store offers new users a 14-day free trial, and there are two paid plans to choose from:
Creator Plan ($29/month):
- Calendar Invites and Bookings (great for coaches)
- Analytics
- Unlimited Courses
- 1 Tap Checkout
- Subscriptions
- Email list/newsletter builder
Pro Option/Creator ($99/month):
- Includes everything in the Creator Plan
- Email marketing
- Unlimited Funnels
- Discount Codes & Upsell Offers
- Ability for Payment Plans
- Affiliate Payments
Stan Store Discount
You also have the option of saving on the monthly fee by paying $300 for the annual plan. The Creator Plan annual plan is $948 a year. That’s a 20% discount!!!
It might look like a lot of money, but it’s actually not, in my opinion. Everything you need is in ONE place, and Stan does not charge a transaction fee on top of the monthly fee!
I have Stan store Pro, and I love it! I paid for the whole year and in addition I got more than 2 months for FREE. I love that I now have the option to offer payment plans, discounts and build my email flow for my email campaign (hello passive income!)

How to set up you Stan Store – Step by Step
I am going to walk you through setting everything up, in 7 steps, using screenshots from my own Stan Store.
Step 1: Dashboard Setup
- Sign Up For Your Free 14 Day Trial: Sign up – Use this link to get 14 days free and try it out. Stan will ask you if you whether you want to extend, you are not be forced into a subscription. Also, you can cancel your Stan subscription at any point.
- Enter Your Details: Fill in your display name, and personal information. Make sure you choose your social media handle if possible. Your Stan store link will have your user name in it. It’s possible to change it later if needed.
Step 2: Design Your Store - Stan store examples
Go to “My Store” and then “Edit Design”. Here you can pick what layout you want for your store front. You can also pick your branding colors for your Stan Store for a more cohesive business aesthetic.
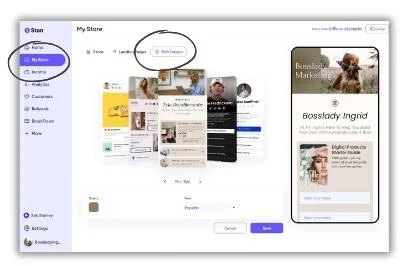
Different designs to choose from, and editable to your own personal brand colors!
- Access Store Design: Go to your dashboard, and Click “My Store”.
- Add Your Logo: Click on the photo icon to add it. If you don’t have one, you can use a photo of yourself.
- Add Your Bio: This is just short description of who you are. It should reflect a shorter version of your Instagram or TikTok bio.
- Add Your Social Links: They ask for your Instagram and TikTok, but you can choose to add any other handles you want like Facebook, Pinterest, and LinkedIn.
- Choose Your Store Design: Next click on “My Store” & then “Edit Design”. Scroll through all the different options. Just select the layout you like, and it will show you what it looks like on the mobile version on the right. You can also click on the color to use a custom color, or to change to another color. Lots of different options, so just play around with it.
Step 3: Create Your Lead Magnet
- Why It Matters: Don’t skip this step!! A lead magnet creates trust, it helps your audience know your style, and it gives them an idea of who you are. Your freebies should also provide value by teaching something they didn’t know. You are giving something away in exchange for their email address. Now just keep providing value, help them, and you will turn this new lead into a customer.
- Creating Your Freebie: Decide what you want to offer. Look at a problem you can help solve. This should be a quick win. You don’t want to give away a 60 page guide. You can give away an ebook, course, video tutorial, recipe, or checklist. Just make sure it is geared towards the audience you want to serve.
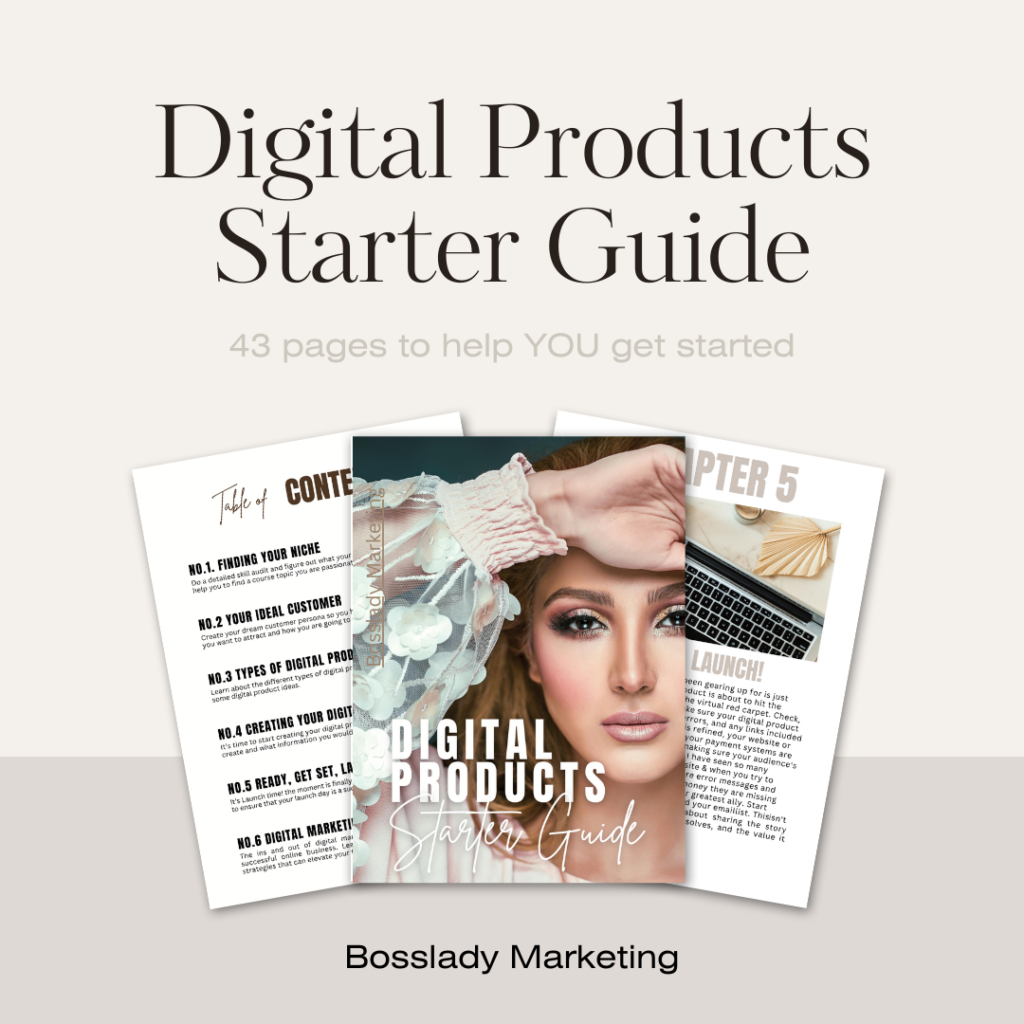
I created my own lead magnet on Canva. If you want to check it out, it’s the guide on the top in my Stan store: Digital products Starter Guide
Feel free to get it and use it as inspiration!
Step 4: How to Add Your Digital Product to Stan Store
I am so excited for this. Once you do this, you will be all ready to start making money with your store in the same way I did! Therefore I’m now gonna walk you through adding products to your Stan Store. It’s super easy, trust me!
The steps for your Digital Products:
1. Access My Store: First, head over to the “My Store” section (see bar on the left) and click on “Add Product” (on the bottom of the page). You’ll see lots of different product types to choose from.

2. Choose Your Product Type: For now, I’m gonna pick “Digital Product” since I’m selling things like PDFs, guides, and exclusive content. This ONLY for digital products, not your freebie.

3. Build Your Product Layout: This is your “Thumbnail” page. You’ll see three options: Button, Callout, and Preview. I’m gonna choose “Callout”. Then, select an image for your product. You can upload your owm immage, or use a stock image from the library.
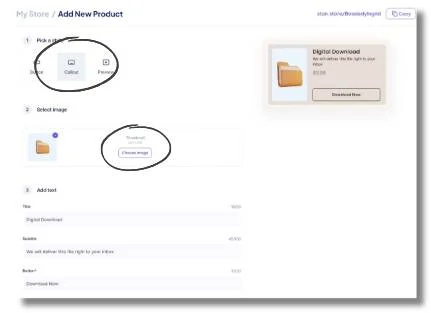
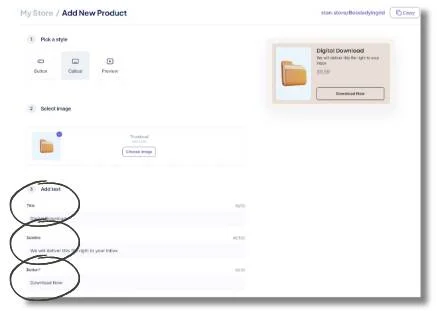
4. Fill in the Details: Time to add the “Title” (up to 50 characters), “Subtitle” (up to 100 characters), and “Button” text (up to 30 characters). The button text is super important because it tells people what to do next. Examples: CLICK HERE, BUY NOW, LEARN MORE, YES PLEASE!
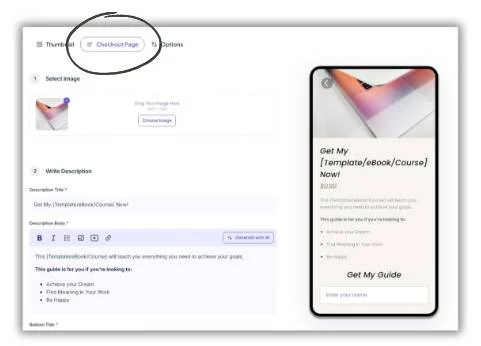
5. Now go to the “Checkout Page”. Here you can 1) “Select Image” upload your own picture here. And 2) “Write Description”, remember you want to go into more detail with a paid offer, show case results, testimonials, anything that shows social proof!
There is an easy to use editor section. You can bold, italicize, add bullets, images, videos, and links. There is even have an AI generator tool to help you out if you get stuck.
6. Set Your Price: Decide how much you wanna sell your product for (and don’t forget to connect your Stripe or PayPal account to your Stan store!)
7. Collect Info: Choose what info you want to collect, like name and email.
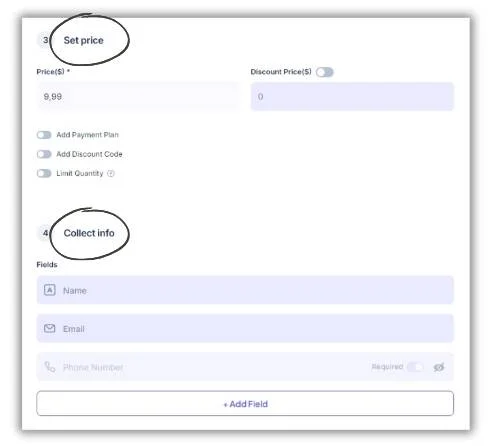
My screenshots could look different than your (free or basic) Stan account, because I have Stan store Pro.
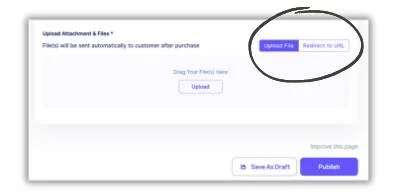
8. Upload your digital product file or add a URL. Upload your PDF(s) OR a redirect TEMPLATE link from CANVA (URL). Please note you can only upload either pdf files OR a re-direct link you CANNOT do both! I uploaded the PDF version of the guide as a PDF file and I also made a ”Thank You” PDF document in CANVA with the Digital Product Canva Template LINK for my customer to access if they want to customize and sell this template. Some people will just want the digital product itself (without the want to resell it), so uploading a PDF version is recommended!
Hit “Publish”.
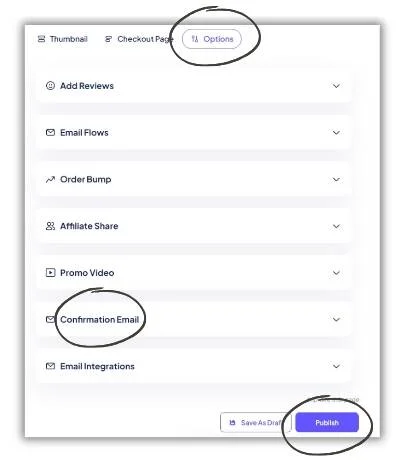
9. Customize Confirmation Email: Go to “Options”. It’ll already have the download link and your contact details (Don’t delete this!). You can personalize the email by adding information. Let them know how much you appreciate them buying from you. You could also offer a free bonus, you can upsell your higher or lower ticket product by selecting this, or anything else you would like to do. For example you can add this text:
“Thank you for purchasing [Product Name]! I’m so excited for you to dive in. I can’t wait to see what you do and how your life changes with this! Here is your download: Shoot me a DM on IG [include hyperlink] when you get a chance to let me know that you’ve taken this step! I’d love to connect & celebrate with you!”
Hit “publish” and you’re good to go!
The steps for your FREE Lead magnet:
1. Add your freebie: Head over to the “My Store” section and click on “Add Product”

2. Select Product Type: Go to My Store, choose “Collect Emails/Applications”. This is ONLY for freebies!

3. Collect Info: Specify what info you want to collect, like name and email. Upload your freebie picture, title, description and any additional information you want. Keep it simplistic.

4. Upload Your File or URL: Head to the “Product” section to upload your freebie as a digital product or a redirect link. Please note you can only upload either pdf files or a re-direct link. You CANNOT do both!
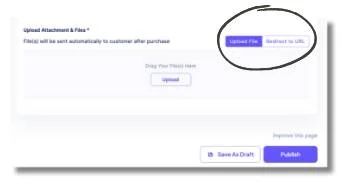
5. Personalize your confirmation email: Click “Advanced” at the top and here you can edit your confirmation email. You don’t have to change anything, you can leave the standard email as it is. Don’t delete anything! You can add some extra information if you like. For example:
“Woohoo! You did it! I am so excited to share more with you about DFY/done-for-you digital products, as well as how you can get YOUR profitable digital product biz up & running! Tomorrow you’re going to get another email from me with more info. Don’t forget, you can always shoot me a DM on IG [include hyperlink] anytime with any questions you have! I am cheering you on!”
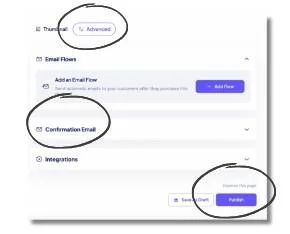
6. Pulblish: Then hit “Publish”. And that’s it!
This is my Lead Magnet:
My FREEBIE: I made it for those you’ve been curious about digital marketing and are looking for a straightforward, no-nonsense guide to kickstart their journey. You can get it (it has MRR & PLR resell rights) here:
Terms and Conditions & Payment
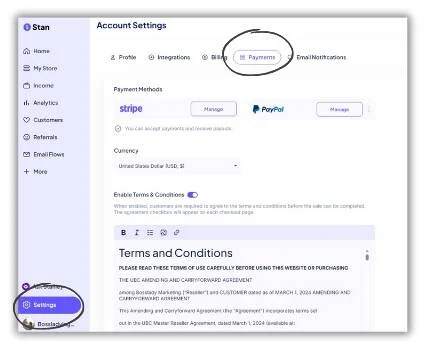
Go to “Settings” and then “Payment” to connect your Stripe and PayPal. Here you can also add your Terms and Conditions, this one is for ALL items in your shop.
Integrations
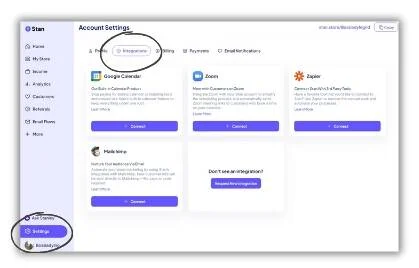
Extra options: connect your Stan store to your Google Calendar, Zoom, Zapier or Mailchimp.
Step 5: Get People to Visit Your Stan Store
- Add to Instagram, Facebook, Pinterest or TikTok Bio: Under the “My Store” section, you will see the link to your store at the top right, just click “Copy” next to the link. It will look something like this: https://stan.store/BossladyIngrid
- Navigate to Your Social Media Profile, click “Edit Profile”, and add your Stan Store link as an external link in the bio section. Now when your audience visits your page, they can click on the link and go right to your store.
Step 6: How to Get People to Download Your Freebie
Get People to Download Your Freebie: Talk about it on your social media pages. Tell them about it in your posts and ask them to do something, like: comment “Guide” below to get it. This not only gets you leads but also gets more people engaging with your post. You can also just tell them to check the link in your bio (Your Stan Store). Say something like “Get my free guide, link in bio.” You can link your store in your stories too, with one click they are right there!
Once they get your freebie, you can add them to your email list and start them on your email marketing campaign.
IMPORTANT: Now that you are building an email list, you will need to create an email marketing campaign. If you only have the $29 Stan Store Creator plan, you will need to use another platform to send emails to your customers. This feature is only available on the Pro Plan for $99/month (or $948 per year).
I have Stan store Pro, because it works best for me. Easy to use, and everything together on one platform.
Of course, setting up your Stan Store is the easy part! Now you actually need people to buy your products. I highly recommend purchasing a complete digital marketing course. In my opinion the Digital marketing courses Roadmap Exclusive and Simply Passive are of THE BEST for beginners. And for more advanced entrepreneurs the Ultimate Branding Course (UBC) is AMAZING! Not only do they cover EVERYTHING and then some. It also comes with Resell Rights.
This means that once you purchase the course, you can resell it. You can add the course right to your new Stan Store and start making sales right away.
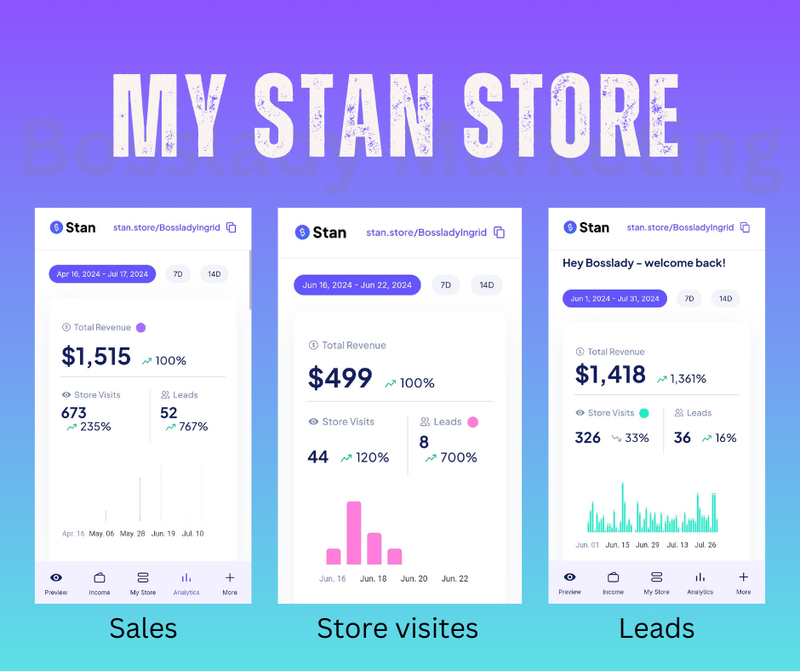
It’s easy to check your sales, store visits and leads (freebies). Screenshots from my Stan store.
More Stan Store Features
We have talked a lot about some very specific features, but Stan Store can do even more. Here are some other things creators can do with Stan Store:
- Create email flows – Upsells, Thank you notes, & Follow up instructions
- “Ask Stanley” and other AI assistance
- Book appointments
- Host courses & webinars
- Create recurring memberships
7. Automate your business with email marketing
Remember how we brought up email lists earlier on? Now we’re going to delve deeper into this (email marketing), because this is what will keep your business running on automation. Email marketing is just another way of saying “selling with emails”. In this day and age, we have the ability to sell directly to our audience, through setting up and sending out automated emails. With a well-written email flow (or sequence of emails) that goes out to your email list, you can build trust and convert leads into customers with ease and automation.
The first thing you will want to do is be sure you have upgraded to a Creator PRO account on Stan Store.
This includes your entire digital product business setup – digital product listings, freebies, email marketing + more. Your business (digital products, freebies, email marketing) will all be in one place. Stan store is the safe choice for an online business. And! You don’t want your emails to end up in the spam box of your customers!
Email flow
An email flow (or work flow) is just a sequence of emails you set up, that will automatically send out to your leads on a set schedule. Ever sign up to someone’s email list and get emails sent out to you every month, week, or even every day? That’s an email flow! These will help your business run on automation.
HERE’S HOW IT WORKS… Someone signs up for your freebie or buys your digital product > they receive automated emails with your message & offer. (HELLO passive income!).
Set up your email flow
When you go to “Email Flows” and then “Flows” you will see this page. Here you can add new email flows, one for each product in your store. Click on the flow you want to edit, or click on “Add Flow” (blue button on the right top) to add a new flow.
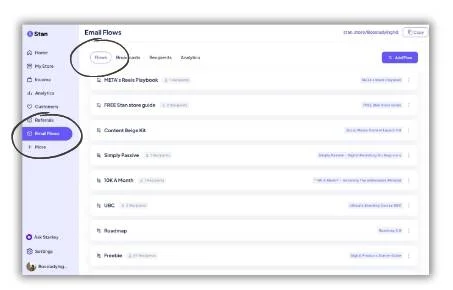
This is what my email flows look like inside Stan Store
Email flow you need
There is just one email flow, or work flow, you will want to have in place when you first launch. However, this flow is for people who opt in for your freebie, and this is the most important one. Above all, it will be sent out the most!
Firstly, there is no one right way to write your flow, but ideally your first few emails offer:
- Value
- An introduction to yourself
- Your story, and your product promotion.
However, here is the email schedule I recommend:
- Welcome & Freebie – Send immediately
- Nurturing Email – 24-48 hours after first email
- Value Email – 24-48 hours after second email
- The Big Offer Email – 24-48 hours after fourth email
- every week an email with an offer, give-away, discount code, or what ever you like to send out to your customers.
Email flow example
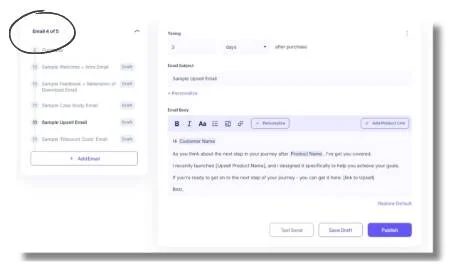
When you open your (new) flow, you see this page.
1. Click on “New Email”. Now you can start writing your email.
2. Start with TIMING, set the amount of minutes/hours/days after purchase you want to send this email. This is your flow.
3. Write your email SUBJECT. You can personalize this with the name of your customer (click on blue text “personalize”) and the name will automatically your customers name.
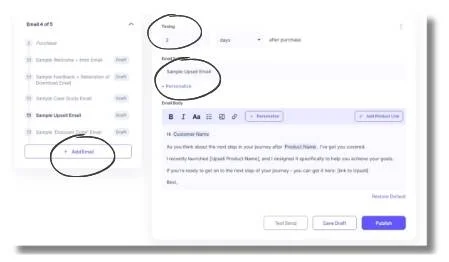
Email flow ideas and tips
4. Write your message here. You can use bold, italicize, add bullets, add images, videos, and links. In addition, I have a few email examples for you, you can copy and paste, and make your own (see below, and more in the free guide at the bottom of this blog)
5. After that, personalize the text with your customers name, or product he/she bought.
6. Add a product link from any product in your store if you like. So people will go directly to that product when they click on it.
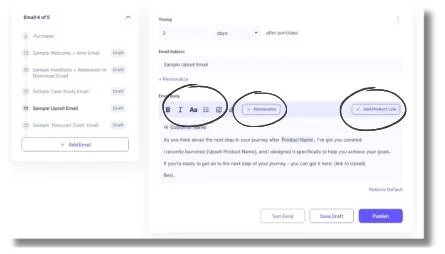
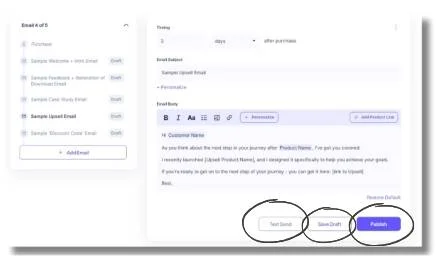
Test, save & publish your email flow
7. When your email is ready, you can test send it (to yourself) to see how it looks, and you can also save in draft.
8. When you’re ready you can hit “PUBLISH” and it’s good to go!
Email flows in your Stan Store
All the emails in this flow will show up here. In other words, this is your overview of all emails in this flow, for this product. You can easily copy and past them into another flow for another product, if you like. Open them and copy the whole text, including images and links. In addition, now open a new flow and paste it there. This saves you a lot of work when you have more email flows to make.
Email flow examples
Don’t know what to write in your email? I’ve got you! I have some email flow templates you can use on the next page. Simply tweak them and use them as your own. 🙂 For instance, you can add links and images, and make it just the way you want it. Choose when it should be sent out (x days after purchase). The name of your client will automatically there, also the products from your store.
Email flow example 1
Subject: Are you ready for your first $3-5k months?
Hi [Customer Name],
Have you had a chance to check out my free guide? If so, and you are ready to use a DFY digital product to get your own passive income biz off the ground, I want to invite you to purchase my [Product Name].
[INSERT FEEDBACK ON YOUR DIGITAL PRODUCT HERE – CAN ADD THESE LATER]
With [Product Name] you will learn everything you need to know about getting a profitable DFY digital product business up and running in the next 30 days (and enjoying $3k, $5k, and even $10k+ months!)
You will get:
My digital product to use, modify, and resell as your own
A step-by-step process for getting your online shop set up with ease and automation
My content strategies for marketing your product in just a few hours a week
PLUS my plug-and-play email templates so your automated system can bring in daily sales even in your sleep!
This is an entire business ready for you to fully make your own and fully profit from.
Why? Because I know just how life-changing a stream of passive income like this can be, and I want to see YOU thriving!
[Your Name]
Email flow example 2
Subject: Another [insert $ amount] made while [insert activity]
Hi [Customer Name],
And just like that, another [insert income made here] today while ______!
This is the beauty of digital products – having a business that runs and makes money for you while you’re out having an actual life!
Are you ready to start leveraging just a few hours a week to bring in continual passive income in the same way?
If so, your next step is purchasing [Product Name], where I’ve already done the legwork and created the product for you.
You can click here [insert hyperlink] to learn more about [Product Name] and get started now.
I am rooting for you and can’t wait to see how your life changes with this!
[Your Name]
Email flow example 3
Subject: [Insert $ amount] in _______ days
Hi [Customer Name],
In the last ____ days, I’ve made [insert $ amount] using nothing more than one digital product.
I want you to imagine this being YOU.
Imagine getting notifications throughout the week while you’re with your kids… or binging Netflix… or folding laundry… or even sleeping!
Notifications letting you know that you just made another sale on a digital product (that you didn’t even have to create from scratch!) all because someone else stumbled across a Reel and decided they wanted in on this kind of life too.
One product bringing in thousands a week while you’re just working 2-3 hours – all so that you can spend the rest of your time enjoying the people and things you love.
If you haven’t already, I want to challenge you to take a bold step.
Purchase [Product Name] for [price] today.
Change your life.
Build a business that can run on autopilot and give you the time and freedom you’ve been dreaming of.
[Your Name]
P.S. Don’t forget, you can always shoot me a DM [insert hyperlink] on Instagram with any questions you have. I am here for you!

Is Stan Store worth it?
- Stan makes it easy to make money with YOUR social media
- Great looking landing pages, that converts visitors into sales
- No coding or special skills, get set up in minutes
- Stan store pricing is fair compared to competitors
Overall, Stan Store was super easy to set up. I’ve tried other platforms, but this one takes the cake for simplicity. It’s perfect for setting up a Link in Bio and making payments with just one click. Plus, it’s not just easy for you, it’s in the same way easy for your buyers too. Above all, Stan Store offers customizable branding and design options, along with analytics tools to track your sales and customer engagement.
In conclusion, I can highly recommend Stan Store!
As a result, I say give it a try, especially since they give you a free 14-day trial to see if it’s your cup of tea. If you sign up, let me know what you think!
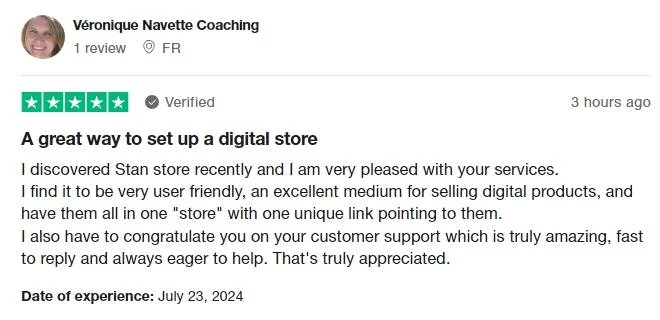
More Stan Store Reviews
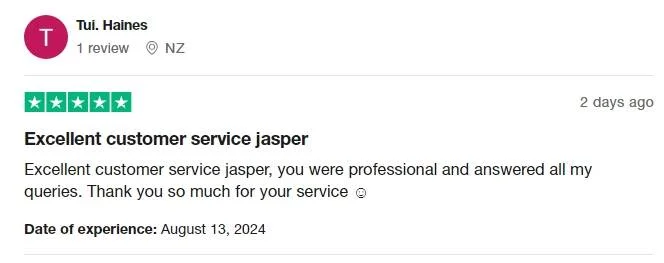
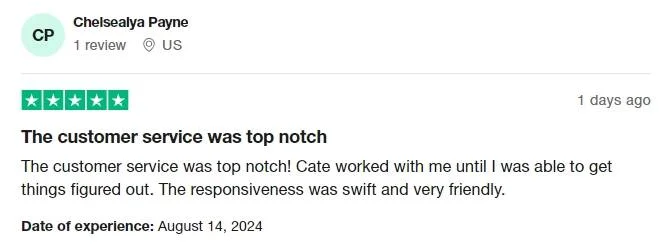
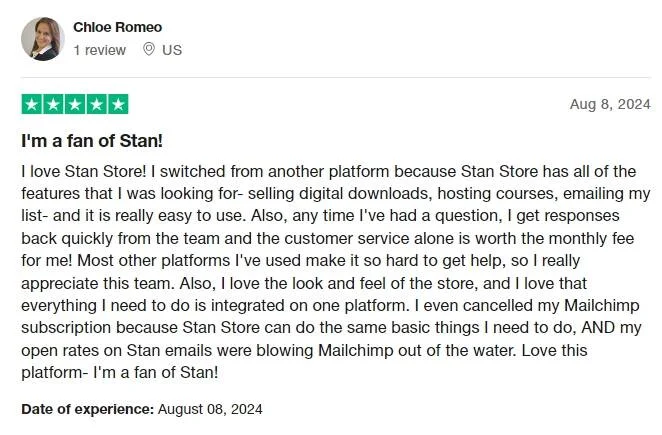
It’s not just me who’s enthusiastic, here are a few reviews from Trustpilot:
Check out my Stan Store for inspiration
You can see my Stan Store here
As you can see, I changed the look a little 😉
Good luck setting up your own Stan store, I hope my guide helps a lot! If you have any question, feel free to comment below and I will answer as soon as possible..
Much love, Ingrid
Share this post: on Twitter on Facebook
