Whether you plan to monetize your blog or share your journey with the world, you’re here because you decided to start the blog of your dreams. So, congratulations! In this tutorial you will learn everything you need to know to start a successful WordPress blog, so you can start making money blogging. Please start the right way, and don’t make the mistakes I made when I started blogging 4 years ago. Let me help you with this easy step-by-step guide.
Disclosure: This post may contain affiliate links, meaning if you decide to purchase via my links, I may earn a commission at no additional cost to you. Please read my disclaimer for more info.

How to make money blogging
Blogging has been one of the most fun things I have ever done. But (as always) I had to fail a couple of times to find the right way to start a blog and make money blogging. This time, I decided to buy a course and get a good mentor, to learn how to do this the RIGHT way. I want to share the valuable knowledge I learned with you because I wish someone had told me this when I got started! It would have saved me so much time.
This is why I want to help you create a self-hosted WordPress blog too. Because, as it turned out, THAT is the way to start correctly, if you ever want to grow and monetize your blog. The first thing you need to do is choose the right web host and you will be safe and set to make money blogging!
How to start a blog for beginners
I first got acquainted with WordPress at the beginning of my course (from a 7 figure blogger, who knows all the tips and tricks!). Bloggers, web designers, and development firms use WordPress to create their websites, and now I do too. I never knew I could do this! WordPress sounds scary for someone with no technical background (me!) but it turned out to be much more beginner-friendly than I thought.
You don’t need to learn coding, and with the right help anyone can learn to work with WordPress. I managed to do it, and so many people before me. It’s the cheapest way to start a proffessional website. So why not give it a try?
In the past, I used to work with a hosted website (a done-for-you website that is super easy to use) but the possibilities were very limited, and trying to make money with it failed hugely. This time I’m doing it the right way, now that I’ve learned how to do it correctly.
The potential a blog can have with self-hosted WordPress is huge, so I have never thought twice about switching to anything else. Now, let’s dive into the details of how to start your very first awesome blog.Are you ready?

How to get started with a self-hosted WordPress Blog
There are a few steps to take to get started with self-hosted WordPress. One of them is to choose a domain name – a blog name. It’s important to know that you do NOT need to know your blog name (domain name) right away! You can start to build your website, and just before you are ready to launch, you can claim your domain name.
This gives you a little extra time to come up with a good and original name, while you start writing your pages and first blogs. If you already have a name, you can get your free domain name right away. But know that you can always do this later too. After all, it’s completely up to you how you want to do this.
I will explain the hosting providers to start with to make it easy for you, so keep on reading. You can save a lot of money here!
WordPress.com or WordPress.org
What is the difference and what to use to host your blog? This confused me in the beginning, so I want you to know the difference before you start. You can get confused about how to choose between the free WordPress.com option or the self-hosted WordPress.org option. It’s a matter of what you want to do with your blog. Ask yourself these questions:
- Are you thinking of making money with your blog, now or in the future?
- Do you want a professional blog with the potential to grow (big)?
If it’s a “yes” to both, the best choice is to go with a self-hosted WordPress blog, which is the WordPress.org option for the blog that you want to create. This way you own your own data and you are in full control of your blog. Your blog will be your own, it’s safe, and here is the opportunity to make money from your blog.
I like to use the analogy of a car to explain this one. Basically, your URL is your car and your hosting is the garage. If you have a self-hosted blog, you own the car (i.e. your blog) and can park it in any garage (i.e. hosting company) you like and change anytime you like if you don’t like the service.
If you choose a free blog – a hosted blog, you are renting a car from a particular garage. They will ‘host’ your rental car at their garage – for free, so you don’t need to worry about finding a garage for your car. The downside is of course you don’t own anything, and you can’t leave and move your car to an other garage. AND it sometimes happens that the host takes down your website (which happened to my mentor!), and there is nothing you can do about it. The garage closes and you lose your car. That means your website is gone forever. The horror!
The second reason it’s important to choose a self-hosted paid website: you can almost NOT monetize a free blog, because it looks unprofessional and brands will choose to work with professional bloggers. If you think about it, all 7-figure bloggers have a paid website, that makes sense, right? So don’t save on this and never go for a free website!

Step-by-step guide to create a website and start a blog
In this blog, I will talk about the hosting options and for Bluehost and SiteGround. I have Bluehost myself, as well as SiteGround. I have two, as a result of my online journey and I chose to keep both along the way. Their support is amazing, and both don’t cost you the world if you decide to quit after one year 😉
Check out Bluehost here, and SiteGround here. And if you have any questions, please let me know. I think I like SiteGround a little better because of the look inside, I can find things easier.
At last, here they are! The 9 steps to set up your self-hosted WordPress blog website.
1. Get a web host
A web host is where your website exists. This means you will own your blog 100% if you host it yourself. As you know, nothing in life is ever free though, all good things come with a price, even if it’s just as little as a few dollars a month.
BlueHost & SiteGround both offer three types of hosting packages. The basic startup packages are very affordable! That is why it is so attractive for starters.
The cheapest option is perfect to start with! I do recommend choosing the 12-month plan because it will take you up to a year (sometimes longer) before your blog will start to grow. You need to give it time. You will get all the features, tools, and guidance you need to build and launch an impressive WordPress website.
The best web hosts: Bluehost and SiteGround
If you sign up you will get a free domain (worth $15), free site builders, free 1-click WordPress install, 24/7 support.
Bluehost starts at $2.49 a month for the first year, and SiteGround at $2.99. Both go up the second year to $6.99 a month. As you can see, the price is not a big difference, and both offer you a free domain. Personally, I’ve noticed SiteGround is easier to navigate, for someone who is not so technical (me!). But it’s very personal which one you like most.
Sign up for SiteGround for just $ 2.99 a month. Or, if you choose Bluehost you can sign up for just $2.49 a month.
To put things into perspective, that’s equivalent to a cup of latte from Starbucks!
Starting your own website doesn't cost you the world
Even though you can start with all free options in the beginning, I’m going to be honest here: keep in mind that your overall hosting costs may add up to be a bit higher when you want to purchase extras such as extra storage, professional email, more backup, etc. It all depends on the type of blog you want and how you want to utilize that blog. Again, all you really need besides the hosting plan is available for free.
It’s up to you if you want to choose for extra paid options. I will share all the free options in my blog, so you can start as cheap as possible, just like I did (I didn’t spend more than $60 with everything included in the beginning). Even the theme – the look of your website – with starter templates, all done for you, is for free. You will have a beautiful-looking website in just one day!
I’ll share more about the themes later. First things first!
2. Choose and register a domain for your blog website
You will get a free domain name with whatever hosting package you purchase. Most hosting companies will offer your first domain for free by the way 😉 But not all offer a good price for beginner bloggers, service, and support.
For instance, if you try blogging for a year, and it turns out you don’t like it as much as you thought you would, there is not much money lost if you decide to quit blogging. I personally like that a lot, because I’ve tried and failed before, and I’m glad I decided to give it another chance with low risk, and still the BEST way to great success.
This way you will host (own) your new domain – your website name. Secondly, choose a simple domain name and check if it is available. Long domain names can be a turn-off sometimes. Make sure it’s easy to say and spell. Write it down and check if there are no rude hidden words and make sure you go for the .com ending.
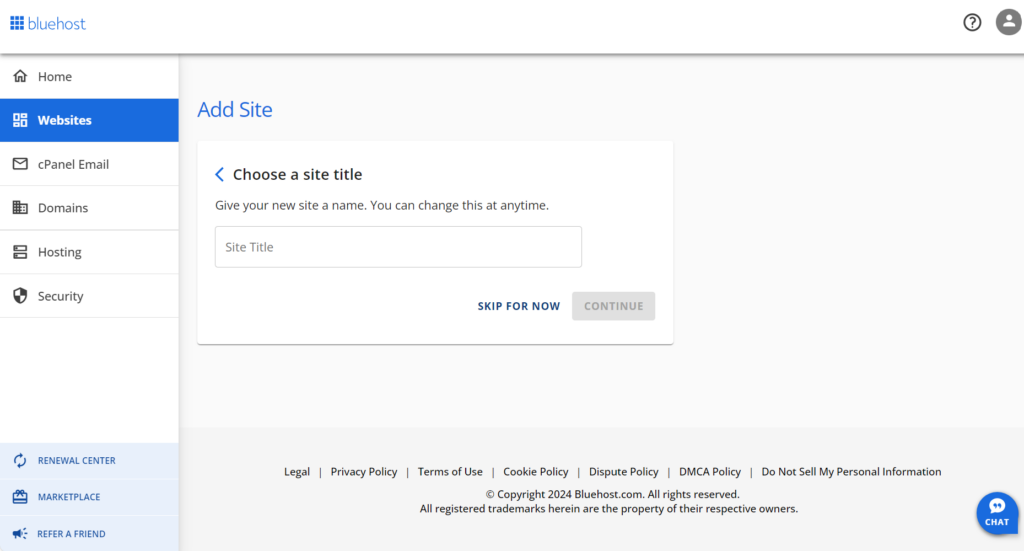
If you already have your own domain name registered somewhere else, please note that it can take up to 2 days before you can log in to your WordPress dashboard. If you’ve just bought your domain name, you should be able to do this straight away.
3. Manage your site, domain and hosting all in one interface
Shortly after confirming the purchase of your hosting, Your host will prompt you to install WordPress.
When you choose WordPress hosting from Bluehost, you get WordPress pre-installed. This is very beginner-friendly because you don’t have to install WordPress manually.
4. Install WordPress to power your website or blog
Remember how I described your domain(your website) as your car, and your hosting company as the garage? Well here is something else you will need to work with: WordPress is the engine! In WordPress, you can build your website and edit your pages. It’s the engine in your car. I hope this makes sense.
Once your domain is ready to be set up, the hosting provider, Bluehost or SiteGround, will let you know and prompt you to install WordPress. Then you follow the prompts. The prompts are easy to follow along, and if you run into trouble, you can use the 24/7 hosting support. Customer service can help you get your WordPress instance up and running for you if you have problems.
5. Select, install and customize your WordPress theme
Next, you need to install a theme. When you start to set up your WordPress blog’s look and feel, you need a theme to work with – a theme is like the bodywork and the paint job for your car. And like cars in real life, generally, the more you pay, the better your car/website looks. With WordPress installed, you get access to a wide variety of blog designs called themes.
Choosing a suitable WordPress theme is one of the most critical steps in building your WordPress website. Your theme controls the appearance and layout of your site, and with thousands of free and premium themes available, the options are endless. You can always change it later if you want.
I use Astra, which is fast, beautiful, and easy to work with. Astra is without a doubt one of the best WordPress themes around. Its free version can even beat most premium themes.
Pick the theme that is most appropriate for your vision or brand, create to your heart’s content, and easily manage it all in one place! Remember, you can change all images, website colors, and fonts to match your brand.
How to install a WordPress theme:
- Go to Appearance > Themes in the admin dashboard.
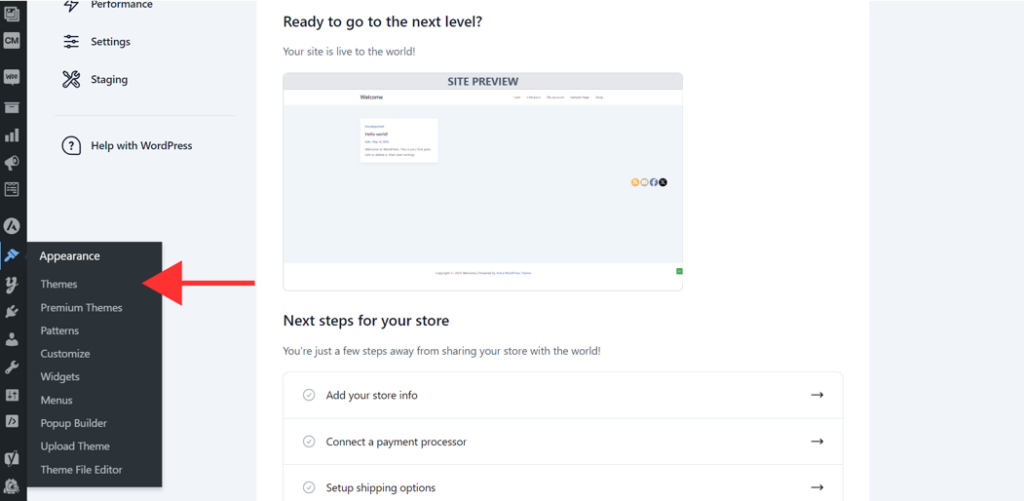
2. Click “Add New” to browse through available themes.
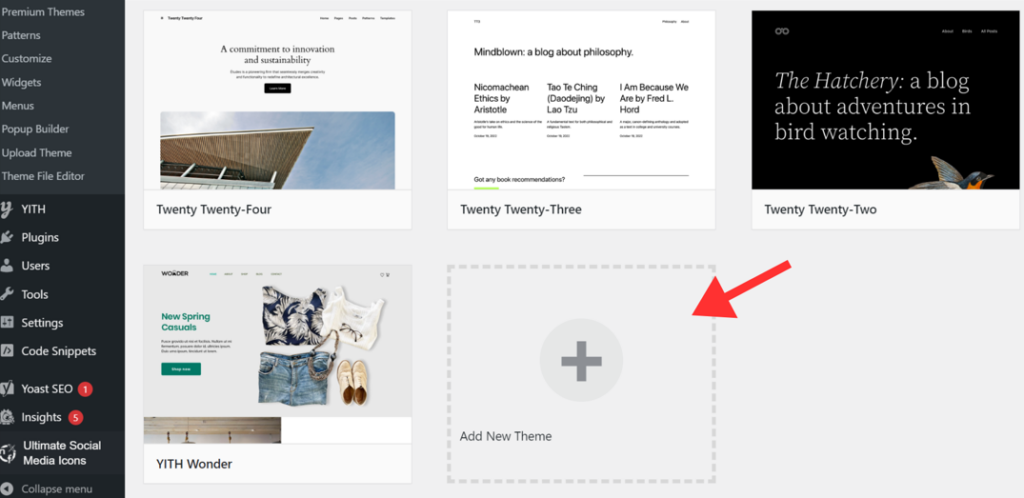
3. Choose the theme that fits your brand > click Install > then Activate it.

Customize the theme using the WordPress Customizer, or install a page builder (like Elementor) for more advanced design options.
Depending on your budget and needs, you can go with many of the free themes out there on WordPress. You can also buy a premium theme, which offers more options. But to be honest, you don’t need those extra options in the beginning. It will be overwhelming enough when you first start with your new website, you can always do this later. I still use a free theme and I’m very happy with it. After all, it’s no problem to keep the costs as low as possible in the beginning. You can purchase premium themes for additional cost later when your blog is a success.
6. Log in to your dashboard
Enter the URL for your blog’s dashboard will prompt you to login if you are not already logged in or if you don’t set your browser to save login information. The URL of your dashboard will look like this: https://www.YOURNEWBLOGNAME.com/wp-admin. This is where you can work on your website, write your blogs, edit the look and layout, etc.
7. Create content for your blog
Once logged in, click ‘Posts’ on the left-hand sidebar, and then select ‘Add New Post’ to create a blog post.
Write a title and create your content for your new blog. It is wise to write your blog in a Word document, or Google doc, so you always have a copy. And simply copy and paste the text into your WordPress blog. Add images to make it look more aesthetic.
Never ever just copy images from Google! Copyright on the pictures can get you in big trouble! If you don’t want to use your own photos, you can get copyright-free images from websites like Pexels.com You can use those free stock images safely.

8. Building your basic pages
Every WordPress website requires essential pages to function correctly. Select ‘Pages’ and then ‘Add New Page’ to create an About page to give your readers some information about you, your background, and your vision.
You also need your legal pages, like a Disclosure, a Home page, Contact, maybe Products, and FAQ. From here the potential of where you can go and what you can do with your blog is endless!

9. Make money blogging!
And now the fun part! Making money from your blog! You can make real money blogging. I am not joking! Starting a blog has been a great way for me to make extra money online, without ever leaving the comfort of my home. And all the women out there (and men!) who have gone before us, who made it to a 6 figure blog within 2 years, that’s what’s possible!
You just need to start, keep going, and give it time. Success won’t come overnight. Blogging takes time, it’s not a get-rich-quick scheme. I think it’s better to know this upfront so you won’t get your hopes up, and quit after 1 month. Some bloggers never make any money, and I used to be one of them. On the second try, I got the help I needed to succeed, and I’m here to share everything I’ve learned over the years in my blogs.
Meanwhile, you’ll need to find ways to drive traffic to your blog in order to make some money though. The golden tip here is to start using free social media to get people to your blog. Ads are also a way you can make money blogging, you can earn money by writing sponsored posts or creating products to sell such as e-books, courses, or services. Affiliate links are also a great way to make money blogging for beginners.
SiteGround Webhosting
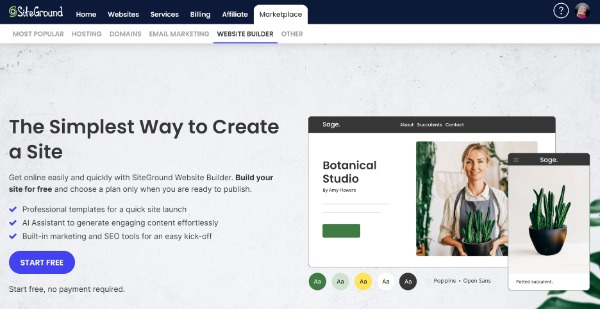
For those who would like to take a look behind the curtains at SiteGround, here’s a screenshot of what it looks like inside my account. Siteground is looks very good and it’s easy to find what you need.
"Passion Led Us Here"

Honestly speaking, I was not an expert in anything when I first started this blog, and I’m still not an expert. I was just as lost as you are right now and had no clue how to make it a success. How to start, where to go, and what to do. I learned a lot over the last few years, and I love to share my experiences and knowledge with you. My passion for blogging keeps me going forward.
You DON’T have to be an expert in your field to start a blog. You can document your learning journey and teach others your mistakes and what you’ve learned. You will grow as your blog will grow. I want to be completely transparent with you and show you that it is possible for anyone to make money blogging, regardless of experience or niche. Keep in mind that starting a blog takes work and dedication, but if you’re willing to put in the effort, it can be an incredibly rewarding experience, both financially and personally.
Now you can start, create, and launch your blog! If you have any questions about how to start a blog and make money, be sure to leave a comment below and ask away.
Much love, Ingrid
Share this post: on Twitter on Facebook
